TUI Wizard
The TUI wizard guides you through macOS VM creation in 6 steps. Launch it by running the install script on your Proxmox host:
bash -c "$(curl -fsSL https://raw.githubusercontent.com/lucid-fabrics/osx-proxmox-next/main/install.sh)"
Step 1: Preflight Checks
Automatically validates your Proxmox host before proceeding.
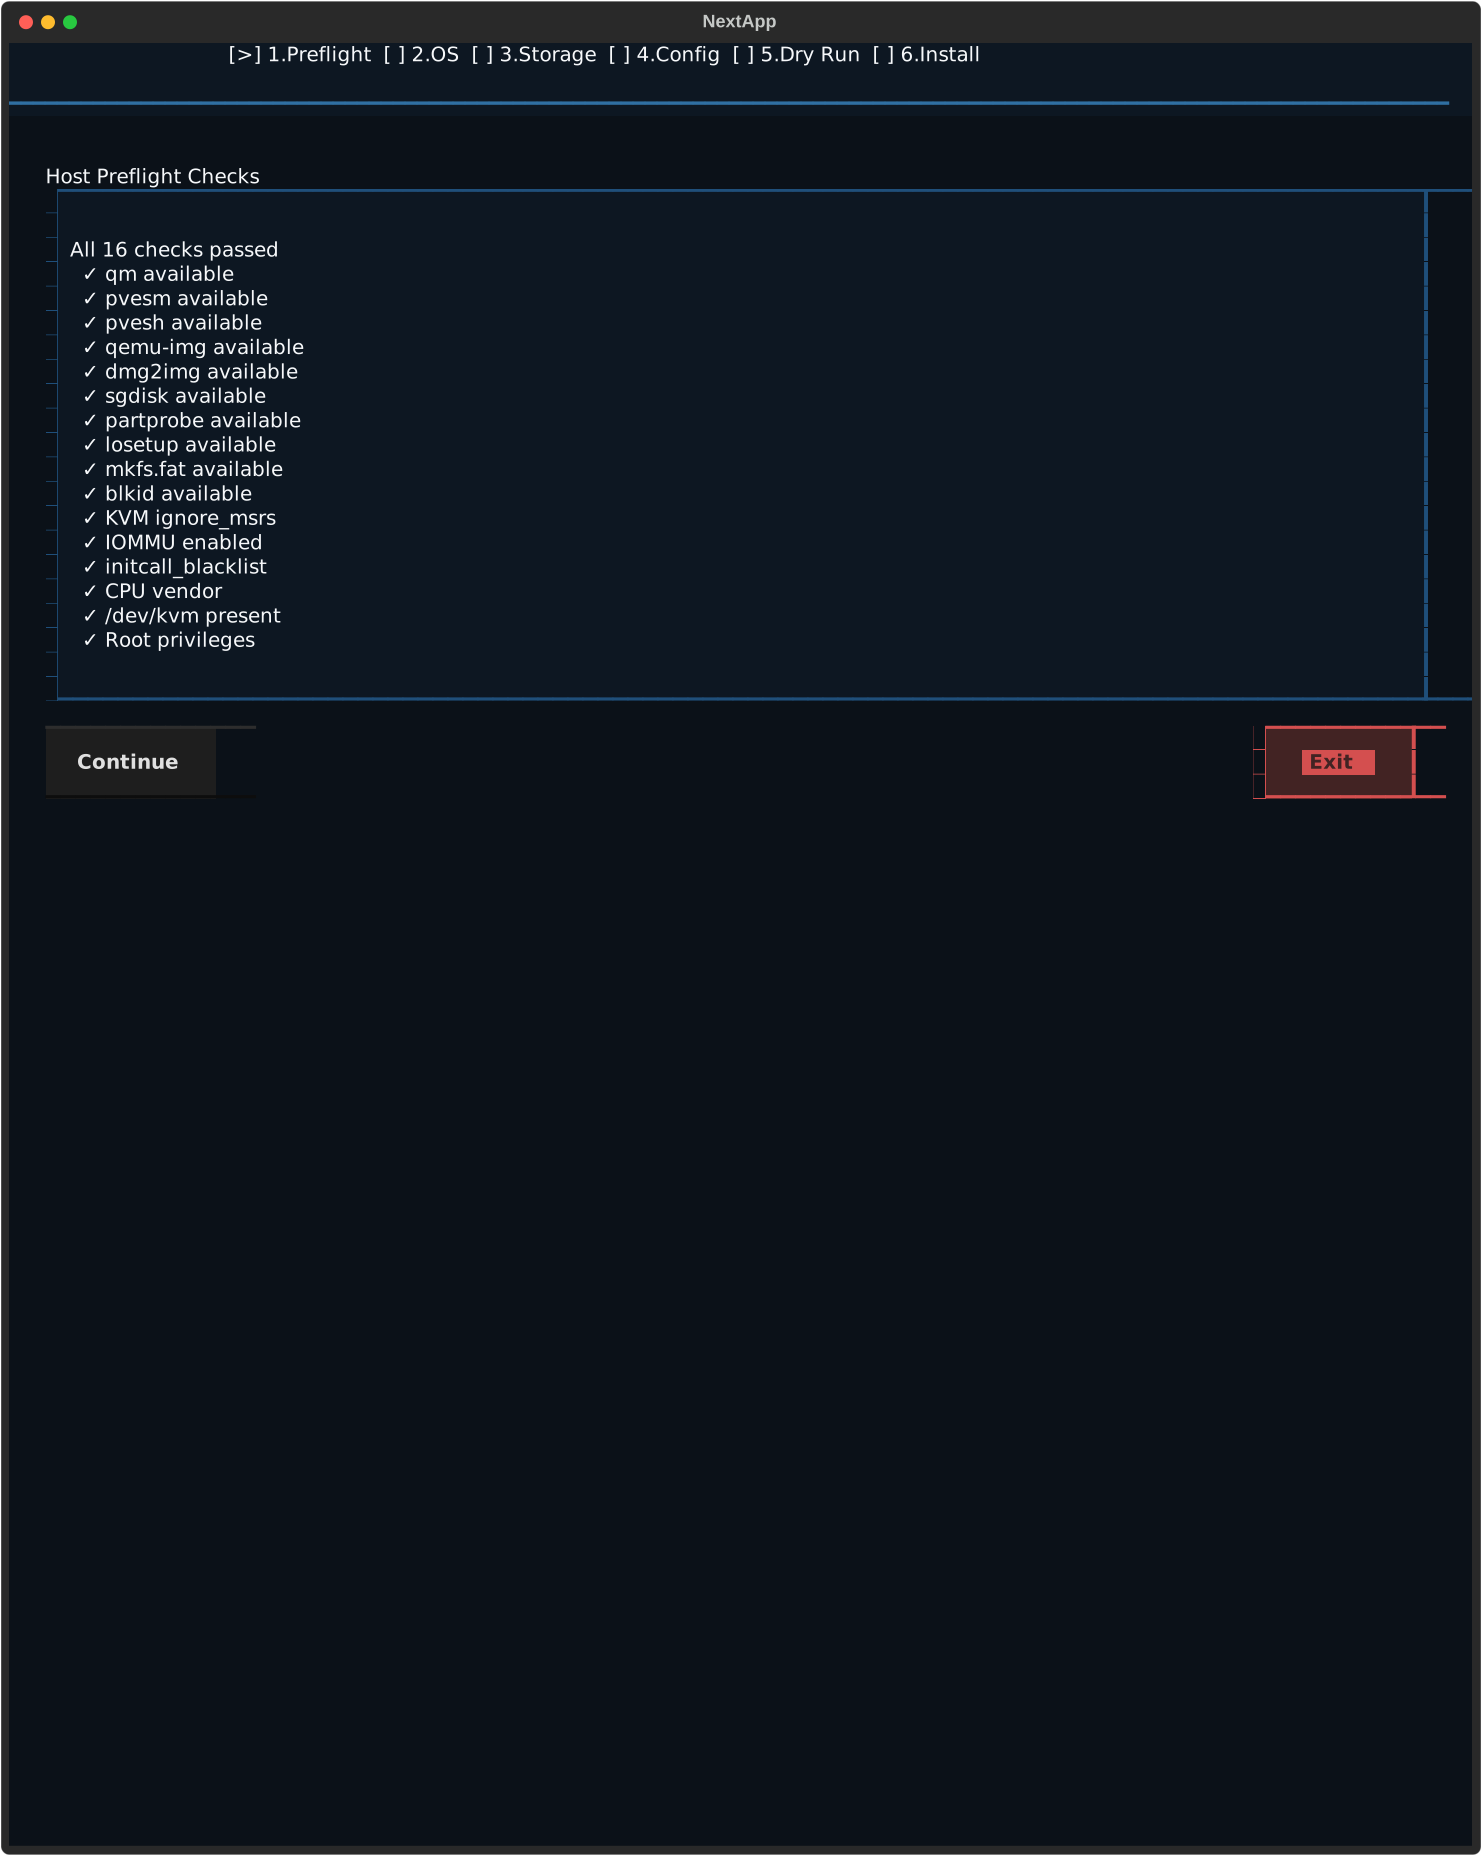
| Check | What It Verifies |
|---|---|
| CPU vendor | Intel or AMD detected, applies correct config |
| Virtualization | VT-x / AMD-V enabled |
| Root access | Running as root on Proxmox |
| Dependencies | Required packages installed |
| TSC flags | constant_tsc and nonstop_tsc for clock stability |
No user input required. The wizard auto-detects your hardware and moves forward.
Xeon and pre-Skylake Intel CPUs are detected automatically. Xeon keeps -cpu host, older consumer Intel gets Penryn mode with e1000 NIC.
Step 2: Choose macOS Version
Select your target macOS version from the list.
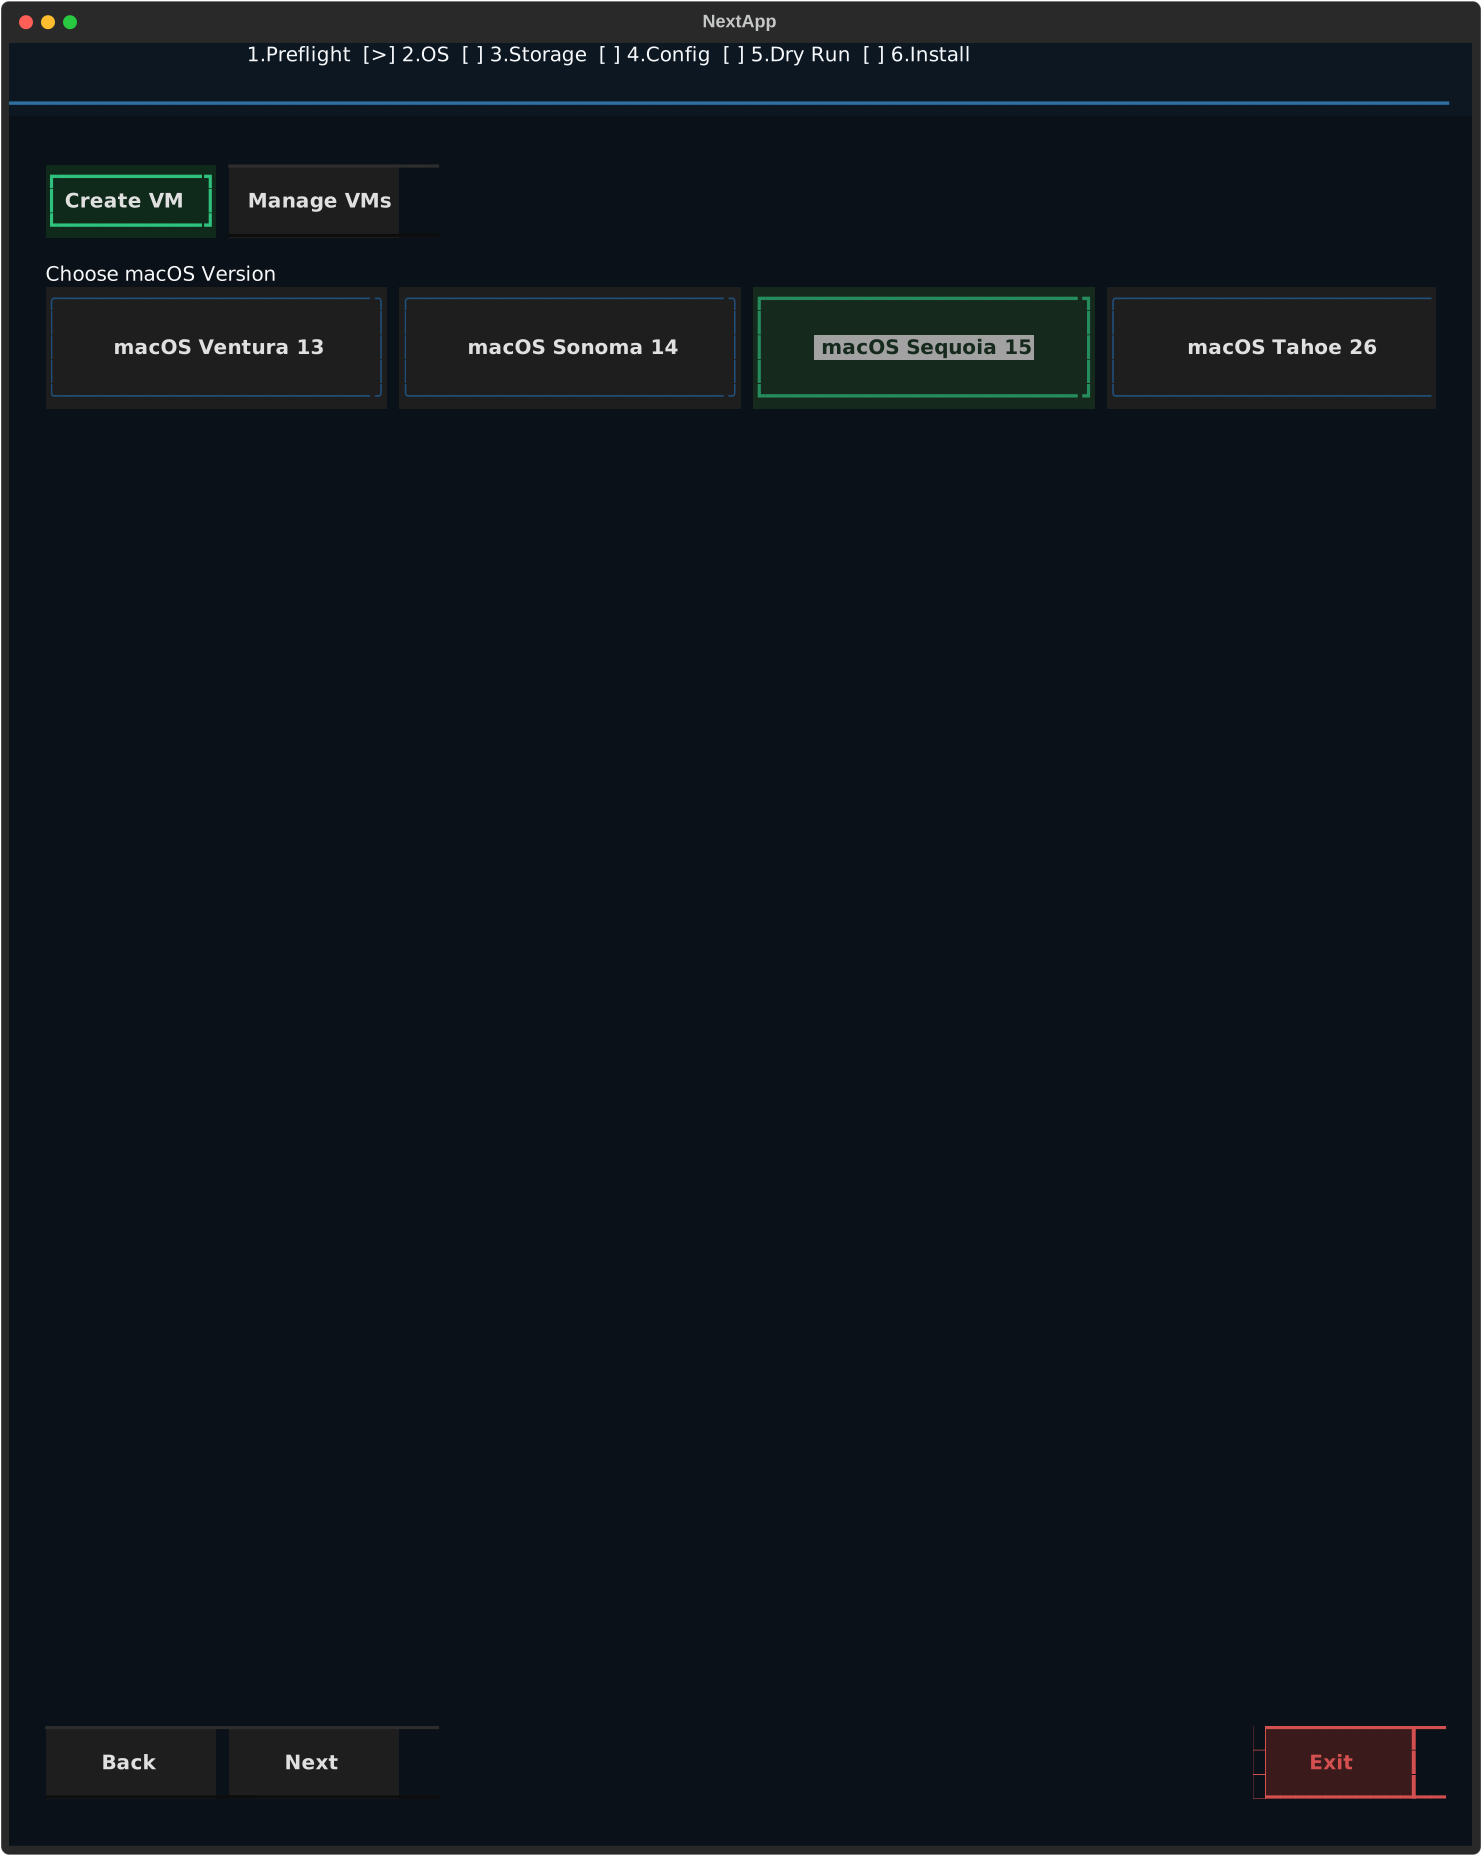
| macOS | Apple Services | Notes |
|---|---|---|
| Ventura 13 | Works | Lightweight, good for older hardware |
| Sonoma 14 | Works | Best tested, most reliable |
| Sequoia 15 | Works (with --apple-services) | Kernel patch applied automatically |
| Tahoe 26 | Works (with --apple-services) | Kernel patch applied automatically |
SMBIOS identity (serial, UUID, model) is auto-generated when you select a version.
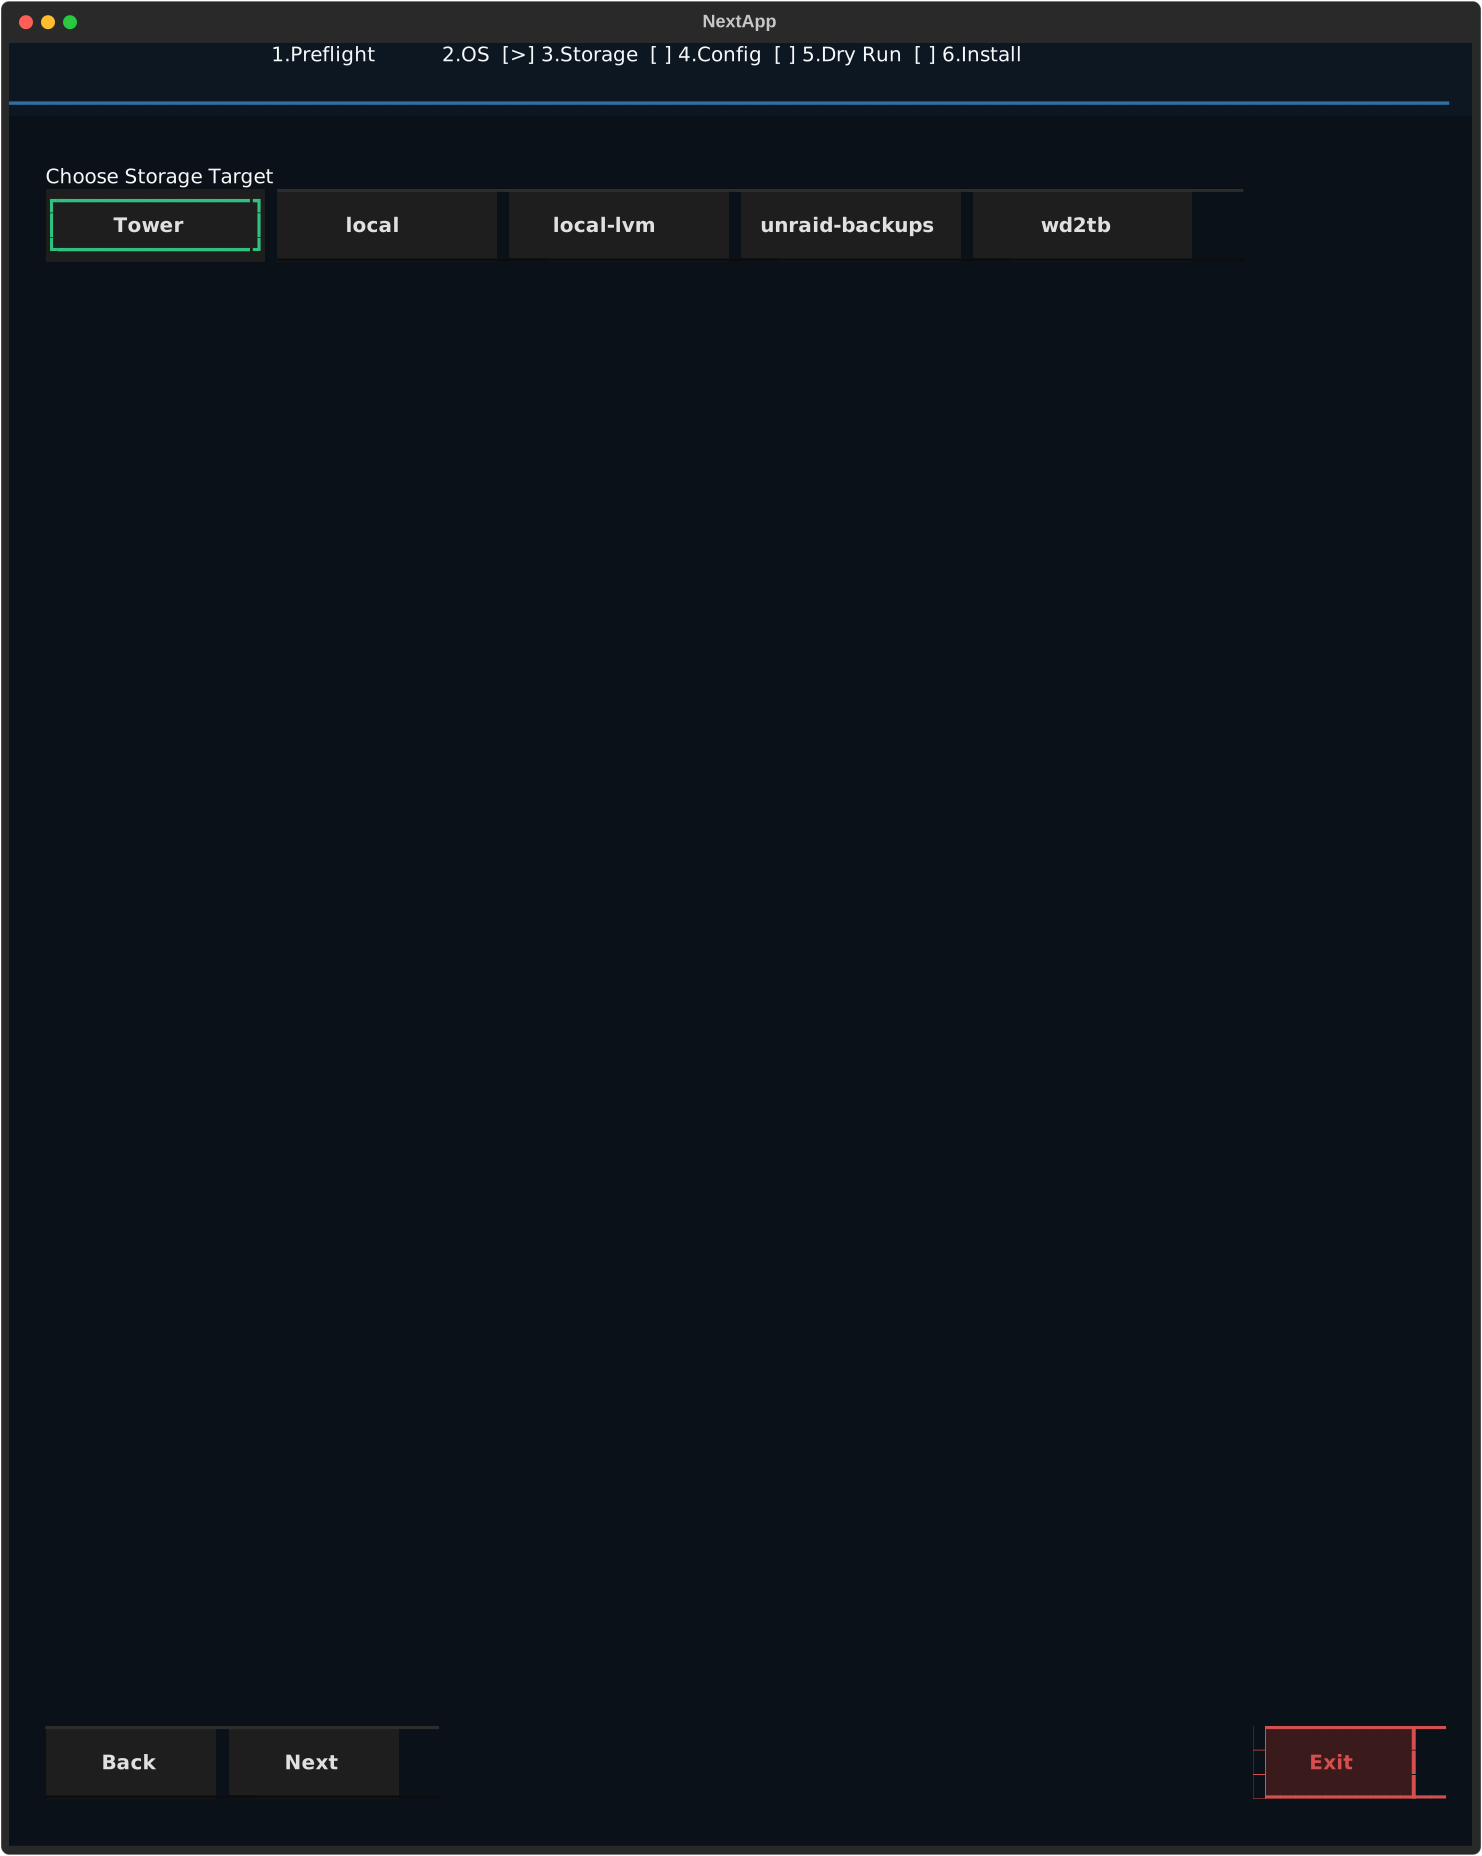
Step 3: Select Storage
Choose a storage target from auto-detected Proxmox storage pools. The wizard scans for available pools (e.g., local-lvm, NAS mounts under /mnt/pve/).
Step 4: VM Configuration
Review and edit VM settings with auto-filled defaults based on your hardware.
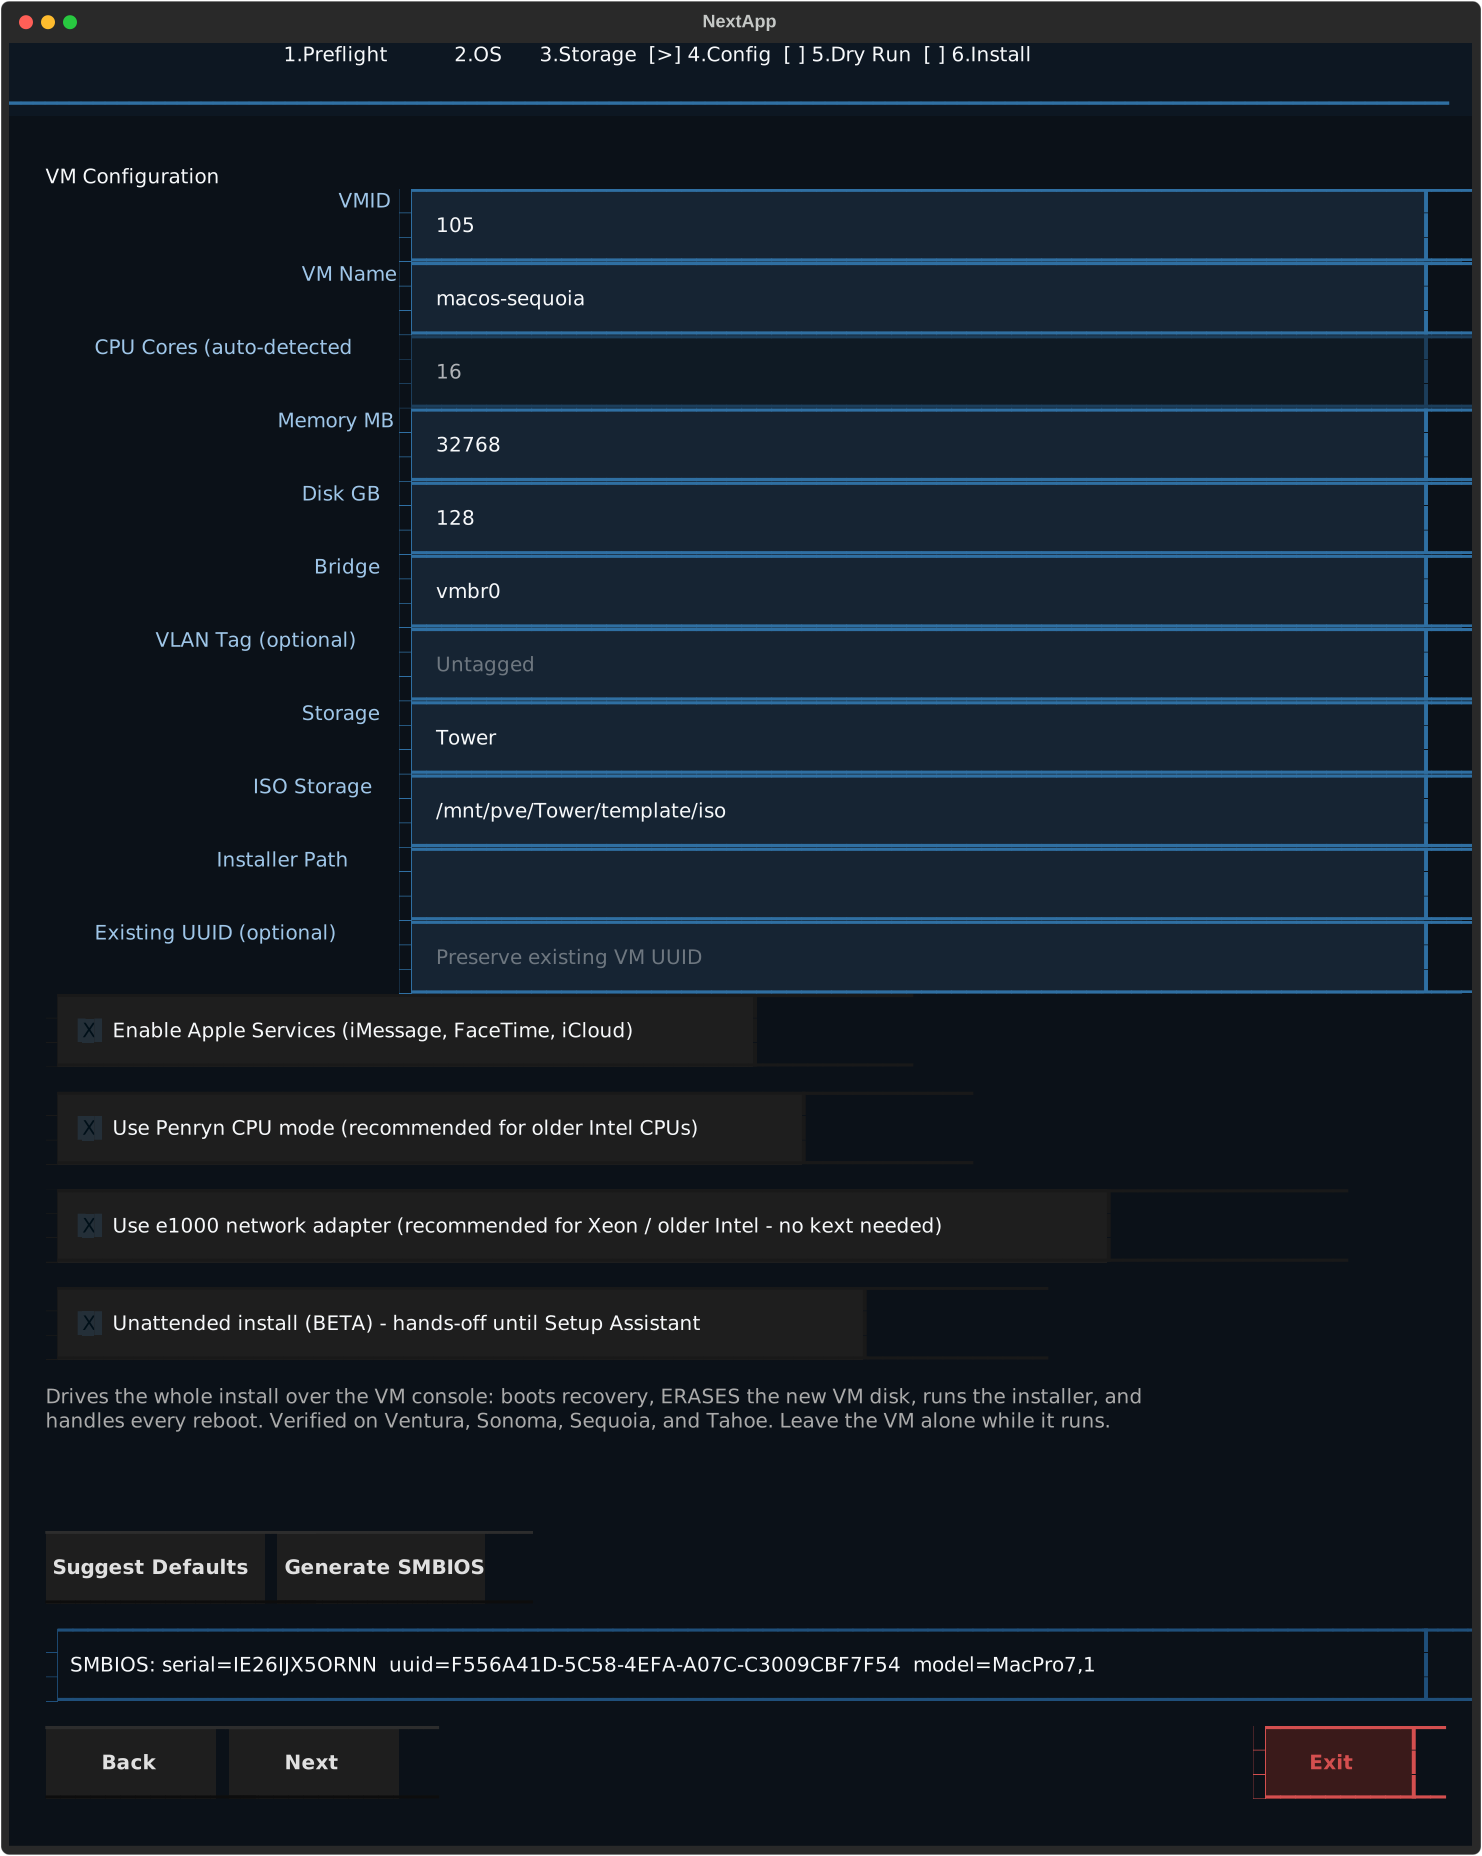
| Field | Default | Description |
|---|---|---|
| VMID | 900 | Must be unique, 100-999999 |
| Name | macos-{version} | VM display name |
| CPU Cores | Auto-detected | Must be power of 2 (2, 4, 8, 16) |
| Memory (MB) | Auto-detected | Minimum 4096 MB |
| Disk (GB) | Varies by version (80-160) | Minimum 64 GB |
| Network Bridge | vmbr0 | Proxmox bridge interface |
| VLAN Tag | Untagged | Optional VLAN tag for net0, 1-4094 |
Additional options available in this step:
- Generate SMBIOS -- regenerate identity values
- Enable Apple Services -- adds
vmgenid, static MAC, and PlatformInfo patching - Verbose Boot -- shows kernel log instead of Apple logo
- Unattended install (BETA) -- finishes the macOS install by itself, see Unattended Install
- Existing UUID -- enter a UUID to preserve identity for re-runs
macOS requires power-of-2 CPU core counts. Non-power-of-2 values (6, 12) can cause the kernel to hang at the Apple logo.
Step 5: Dry Run
The wizard auto-downloads any missing assets (OpenCore ISO, recovery image), then previews every qm command that will be executed.
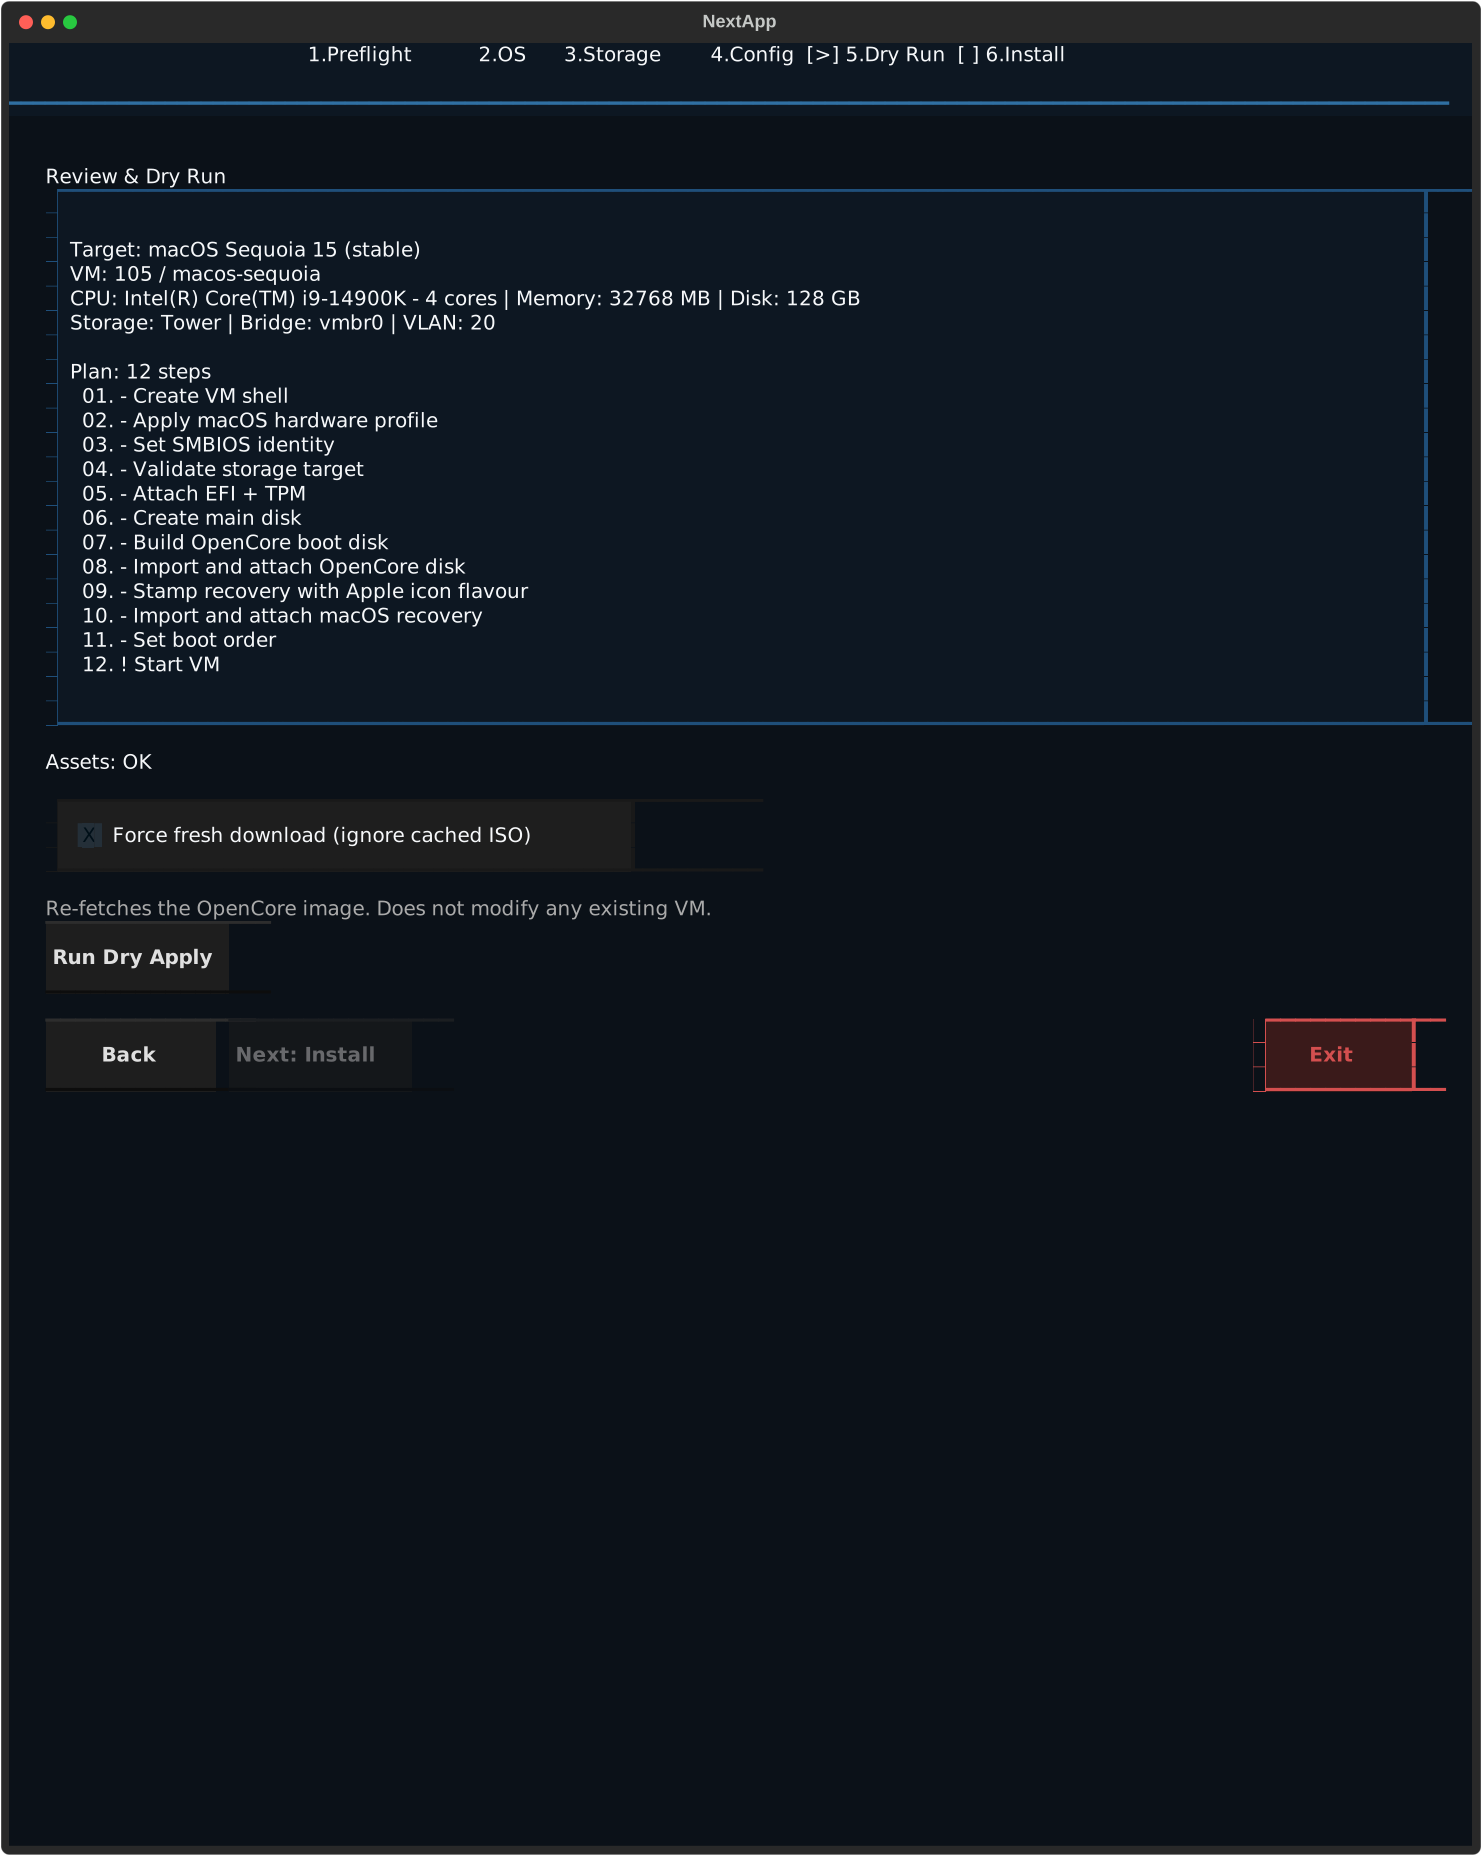
This step shows:
- Each command with its title and risk level
- The full
qm create,qm set, and disk import sequence - SMBIOS values that will be applied
- Boot order configuration
Nothing is executed yet. Review the commands before proceeding.
Smart caching: OpenCore and recovery images are downloaded once and reused. Creating a second VM with the same macOS version skips the download entirely.
Step 6: Install
Executes all commands from the dry-run preview:
- Creates the VM with
qm create - Builds the OpenCore bootloader (GPT + EFI partition)
- Imports OpenCore and recovery disks via
qm disk import(falls back toqm importdiskon older Proxmox) - Configures boot order (
ide2;virtio0;ide0) - Starts the VM
After completion, open the VM console via Proxmox web UI (noVNC) to continue macOS installation.
Post-Install
Run this as soon as the installer reboots the VM for the first time, not only once macOS is fully installed:
osx-next-cli post-install --vmid <id> --execute
It detaches recovery, sets boot order ide0;virtio0, and restores the picker's 15 second auto-boot. Until you run it, every reboot stops at the picker with recovery listed first, so the install only resumes if you pick the installer by hand.
Manage Mode
After creating VMs, launch the wizard with the --manage flag to manage existing macOS VMs:
osx-next --manage
Manage mode lists all macOS VMs detected on the host (identified by isa-applesmc in their config) and provides three actions per VM:
| Action | What It Does |
|---|---|
| Edit | Opens an edit form to change cores, memory, name, network bridge, or disk size. Changes are previewed before applying. |
| Start / Stop | Toggles the VM power state. |
| Destroy | Stops and destroys the VM. A config snapshot is saved to generated/snapshots/ before destruction. Rollback hints are shown on failure. |
The edit form in manage mode behaves the same as the edit subcommand: the VM is stopped before changes are applied, existing MAC address and NIC model are preserved when changing the bridge, and the VM can optionally be restarted after.